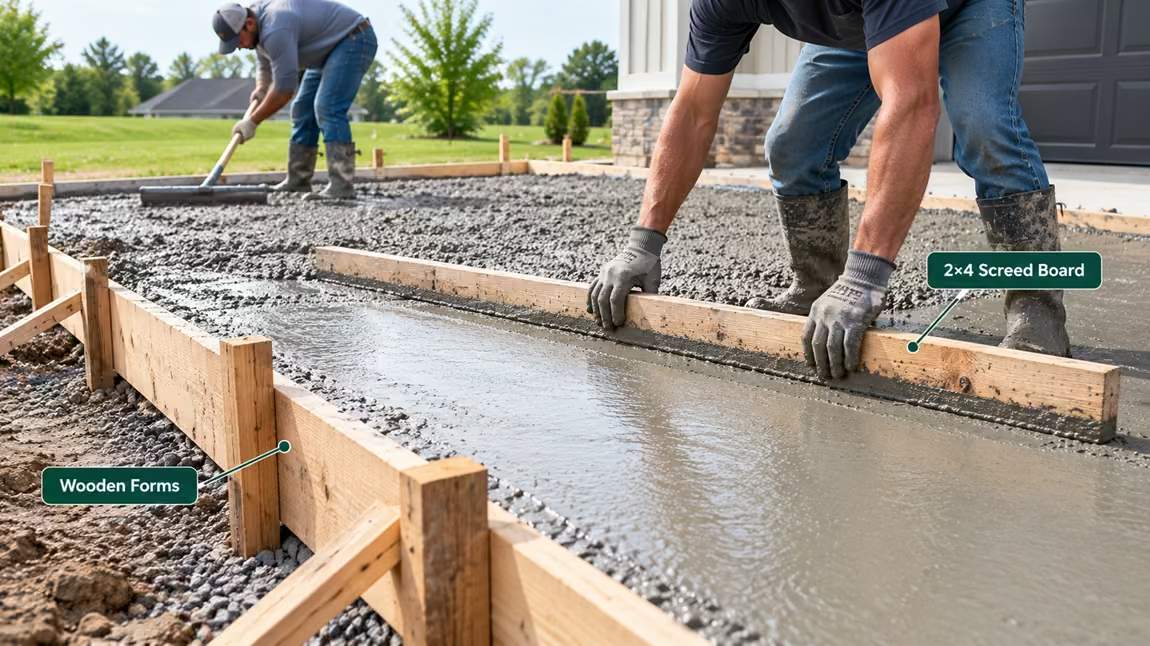
To pour a concrete slab, dig out the area, compact the soil, add about 4 inches of compacted gravel, and build wood forms set to the finished height. Place rebar or wire mesh, then pour the concrete, level it with a straight board (screed), smooth it with a bull float, cut control joints and give it a broom or trowel finish. Keep it damp while it cures, and remove the forms after a day or two.
Most of the success happens before the truck arrives: a firm base, strong forms and enough helpers. Once concrete starts to set, you can’t stop and fix things. This guide walks through each step, shows how to build forms and space control joints, and works out the concrete, rebar and gravel for a shed pad with our concrete calculator.
Before you pour: plan the slab
- Pick the thickness. Most patios, walkways, shed pads and garage floors are 4 inches thick, and driveways 4 to 6 inches. Our guide on how thick a concrete slab should be covers each project.
- Check permits. Many towns require a permit for driveways, large patios and slabs under buildings, and some limit how close a slab can be to a property line.
- Call 811 a few business days before you dig. It’s the free US call-before-you-dig line, and the utilities will mark buried lines.
- Plan the slope. Outdoor slabs should fall about ⅛ to ¼ inch per foot so water runs off, away from the house.
- Watch the weather. Mild, dry days are best. Don’t pour on frozen ground or with heavy rain on the way.
- Line up helpers. A truck pour needs at least two or three people to place, screed and float the concrete before it sets.
Tools and materials
- Shovel, wheelbarrow, steel rake and a concrete rake (come-along)
- A plate compactor or hand tamper
- 2×4 or 2×6 boards and wood stakes for the forms, plus screws and a drill
- String line, stakes, a long level and a tape measure
- Crushed stone for the base
- Rebar with chairs and tie wire, or wire mesh
- Plastic vapor barrier for indoor floors
- A straight 2×4 for screeding, a bull float, a hand float, an edger and a groover
- A steel trowel or a concrete broom for the final finish
- Concrete: bags and a mixer for small slabs, or ready-mix from a truck
- Rubber boots, waterproof gloves and eye protection (wet concrete burns skin)
How to pour a concrete slab step by step
- Mark and dig. Mark the slab with stakes and string. Remove the grass, topsoil and roots, and dig deep enough for the gravel base plus the slab, minus however much the slab will sit above the ground.
- Compact the soil and add the base. Compact the soil, then spread about 4 inches of crushed stone and compact it until it’s firm and even. Shape the base to match the slope you want.
- Build the forms. Set boards around the edges with their tops at the finished height of the slab, staked and screwed in place (see the forms section below).
- Add a vapor barrier and reinforcement. For indoor floors such as garages, lay plastic sheeting over the base. Set rebar on chairs, or wire mesh on supports, so it sits near the middle of the slab, not on the ground.
- Get the concrete. Mix bags with a mixer for small slabs, or order ready-mix for anything bigger. Wet the base lightly just before the pour on hot days, so it doesn’t pull water out of the concrete.
- Place the concrete. Start at the far end and place the concrete close to where it will stay, instead of dragging it far. Fill slightly above the forms, and work it into the corners and edges with a shovel.
- Screed it. Rest a straight 2×4 on the forms and pull it across the slab with a side-to-side sawing motion. Fill low spots and screed again.
- Bull float it. Right after screeding, push and pull a bull float across the surface to smooth it and push the stones just below the top.
- Wait for the bleed water. A sheen of water rises to the top. Let it dry off before you do any more finishing, because working it back in weakens the surface.
- Edge and cut the joints. Run an edger along the forms to round the edges, and cut control joints with a groover, or saw them later (see below).
- Give it a final finish. Pull a broom across the slab for a slip-resistant outdoor surface, or smooth it with a steel trowel for an indoor floor.
- Cure it. Keep the slab damp for about a week, or cover it with plastic or a curing compound. Our guide on how long concrete takes to cure shows when you can walk and drive on it.
- Remove the forms. For most slabs, the forms can come off after 24 to 48 hours.
How to build forms for a concrete slab
Forms hold the wet concrete in shape and set the height of the finished slab, so they need to be straight, level (or set to your slope) and well braced. Concrete is heavy, and a weak form can bow out in the middle of the pour.
- Use straight 2× lumber. 2×6 boards suit 4 to 5 inch slabs. 2×4s measure only 3½ inches, so use them only for thinner slabs or set them carefully above the base. Use 2×8s or deeper boards for thick slabs and thickened edges.
- Stake every 3 to 4 feet. Drive stakes on the outside of the boards, at every corner and joint, and screw through the stakes into the forms. Keep the stake tops at or below the top of the form so the screed board can slide over them.
- Set the height with a string line. Run a string at the finished height, including the slope, and set the form tops to it.
- Square the corners. Measure both diagonals. When they match, the slab is square.
- Bend thin material for curves. Use ¼ to ½ inch plywood or hardboard, staked every foot or two.
- Oil the inside faces with a form release, so the boards come off cleanly.
How thick should concrete forms be?
For slabs, standard 2× lumber (1½ inches thick) is strong enough for the sides, as long as it’s staked every 3 to 4 feet. The width of the board matters more than its thickness: it should be at least as wide as the slab is deep, so the full edge is held in place.
Rebar, wire mesh or fiber?
| Option | What it does | Best for |
|---|---|---|
| Rebar grid | Holds cracks tightly closed and adds strength. #3 or #4 bars tied in a grid, often 12 to 24 inches apart. | Driveways, garage floors and slabs that carry heavy loads |
| Welded wire mesh | Holds small cracks together. It only works if it’s lifted into the middle of the slab. | Patios, walkways and shed pads |
| Fiber in the mix | Reduces small surface cracks while the concrete dries. It doesn’t replace rebar for strength. | Used along with rebar or mesh, or alone for light-duty slabs |
Rebar or mesh does nothing lying on the gravel. Set it on plastic or concrete chairs near the middle of the slab, and keep it about 2 to 3 inches back from the edges. The rebar calculator counts the bars, sticks and ties for your slab.
How far apart should control joints be?
Concrete shrinks as it dries, and it will crack somewhere. Control joints are grooves that make it crack in a straight line where you choose. A common rule is to space them, in feet, about 2 to 3 times the slab thickness in inches, and cut them a quarter of the slab’s depth.
| Slab thickness | Joint spacing | Joint depth |
|---|---|---|
| 4 in | 8 to 12 ft | 1 in |
| 5 in | 10 to 15 ft | 1¼ in |
| 6 in | 12 to 18 ft | 1½ in |
Keep each panel close to square, with the long side no more than about 1½ times the short side. Cut joints with a groover while the concrete is soft, or saw them as soon as the surface is hard enough that the blade doesn’t tear the edges, usually within the first day.
Bags or a ready-mix truck?
For a small slab of up to about 1 cubic yard, bagged concrete and a rented mixer work well. For anything bigger, ready-mix is usually easier and gives a more even result, because the whole slab is poured from one batch. Small truck orders often carry a short-load fee, so ask your supplier.
| Bag size | Yield per bag | Bags per cubic yard |
|---|---|---|
| 80 lb | 0.60 cu ft | 45 |
| 60 lb | 0.45 cu ft | 60 |
| 40 lb | 0.30 cu ft | 90 |
Never add extra water to make the concrete easier to spread. It makes the slab weaker and more likely to crack and dust.
Pouring in hot, cold or rainy weather
- Hot or windy weather: pour early in the morning, dampen the base first, and start curing as soon as the finish is done, because the surface can dry and crack quickly.
- Cold weather: never pour on frozen ground. Protect new concrete from freezing for at least the first 2 days, using concrete blankets or insulated covers.
- Rain: keep plastic sheeting on hand. Rain on fresh concrete washes out the surface and leaves it weak and pitted.
Can you dry pour a concrete slab?
It isn’t a good idea. Dry pouring means spreading dry mix and wetting it from above, instead of mixing it first. The water doesn’t reach all of the cement evenly, so the slab ends up weak in spots, with a dusty, flaky surface that cracks easily. Some fast-setting mixes are made to be poured dry into post holes, but for a slab, mix the concrete fully before you place it.
Worked example: a 10 × 12 ft shed pad
Say you’re pouring a 10 × 12 ft shed pad, 4 inches thick, on a 4-inch gravel base:
- Concrete: 12 × 10 × 4 ÷ 12 = 40 cubic feet
- Plus 10% extra for spills and uneven ground: 40 × 1.10 = 44 cubic feet, or 1.63 cubic yards
- In 80 lb bags at 0.6 cu ft each: 74 bags. That many bags is a lot of mixing, so ready-mix is worth pricing.
- Rebar: #3 bars, 18 inches apart and 3 inches in from the edges, make an 8 × 9 grid of about 178 ft, or 10 sticks 20 ft long with 5% extra, about 67 lb, and 72 ties.
- Gravel base: 4 inches of crusher run with 15% extra for compaction is about 1.7 cubic yards, or 2.6 tons.
Enter your own size and thickness in the concrete calculator. For the base, the crushed stone calculator works out the tons. If the shed walls will sit on the slab edges, thicken the outer edge by 1 to 2 inches.
Frequently asked questions
What is a slab on grade?
A slab on grade is a concrete slab poured directly on prepared ground, usually over a compacted gravel base, instead of on a raised foundation or over a basement. Patios, garage floors, shed pads and many house floors are slabs on grade.
What’s the difference between concrete and cement?
Cement is the gray powder that acts as the glue. Concrete is cement mixed with sand, gravel and water. A “cement slab” is really a concrete slab.
Do you need gravel under a concrete slab?
Usually, yes. About 4 inches of compacted crushed stone gives the slab even support and lets water drain away. Pouring straight onto soil works only on firm, well-drained ground, and the slab is more likely to crack and settle.
Do you need rebar in a concrete slab?
Not always, but it helps. Rebar or wire mesh holds cracks tightly closed so the pieces don’t shift. It’s worth adding to driveways, garage floors and any slab that will carry heavy loads, and many builders use it in patios and shed pads too.
How do you pour concrete on a slope?
Dig the base level, or in steps, so the slab has even thickness, and set the forms to the finished slope you want. Use a stiffer mix so it doesn’t slide downhill, and start pouring at the low end. On steep ground, steps or a retaining wall usually work better than one sloped slab.
Can you pour a concrete slab yourself?
Yes, for small slabs such as shed pads, walkways and small patios, if you have helpers and the tools ready. Large driveways and garage floors are harder, because a lot of concrete has to be finished before it sets, so many homeowners hire a crew for those.
Thicknesses, spacings and times in this guide are typical for planning. Soil, climate, loads and local codes change what your slab needs, so check with your building department and your concrete supplier before you pour.
Keep reading
 Concrete & AsphaltHow Long Does Concrete Take to Cure? Drying, Walking and Driving TimesConcrete is hard enough to walk on after 24 to 48 hours and to drive a car on…Read the guide →7 min read
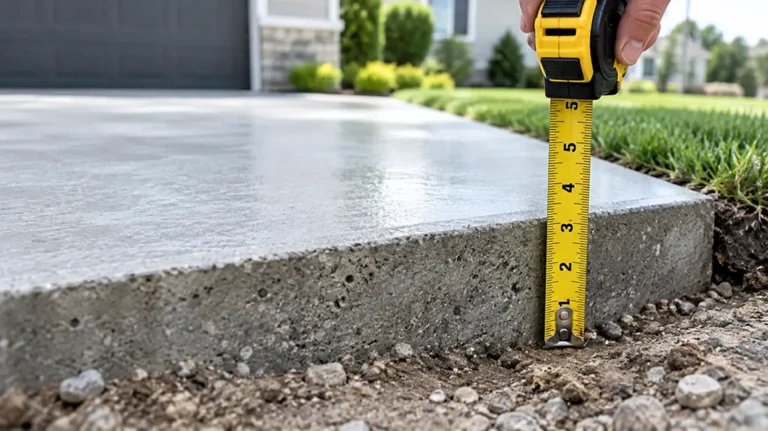 Concrete & AsphaltHow Thick Should a Concrete Slab Be? Driveways, Patios, Garages and MoreMost concrete slabs around a home are 4 inches thick. That covers patios, sidewalks, shed floors, garage floors…Read the guide →7 min read
 Walls, Ceilings & LightingPaint Sheens Explained: Flat, Eggshell, Satin, Semi-GlossPaint sheen is how shiny the dried paint looks. From least to most shiny, the common sheens are…Read the guide →8 min read